A straightener brush can display the correct temperature while heating unevenly, overshooting during warm-up, or varying between samples. A useful buyer test must separate the displayed setting from the temperature actually delivered across the working area.
A hair straightener brush temperature test should cover more than one point and more than one moment. Buyers should compare the selected temperature with actual working-surface readings, map heat distribution across the brush head, record warm-up and steady-state behavior, control the test conditions, and compare multiple samples. Accuracy, stability, distribution, overshoot, and unit-to-unit consistency should be judged against the approved product requirements.
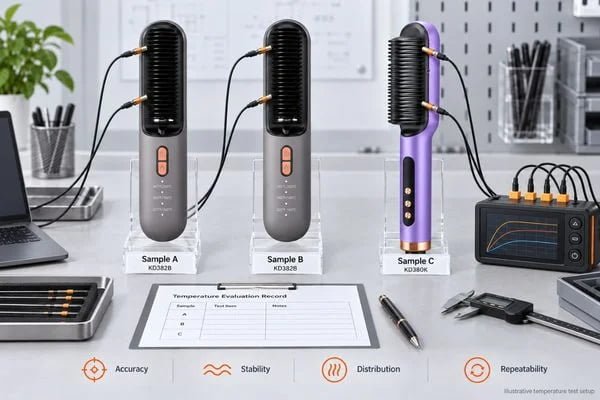
What Do Temperature Accuracy and Stability Actually Mean?
Temperature testing becomes confusing when several different temperatures are treated as the same value.
A hair straightener brush may have a selected setting, a displayed value, an internal sensor reading, and several different temperatures across its working surface. These values can be related without being identical.
Buyers should distinguish between the following terms before testing begins:
| Measurement | What It Means | Why It Matters |
|---|---|---|
| Selected temperature | The level or setpoint chosen by the user | Establishes the intended operating condition |
| Displayed temperature | The temperature value or level shown by the product | May represent a programmed setpoint rather than an actual surface reading |
| Measured working temperature | Temperature measured at a defined working point | Shows what the selected area actually reaches |
| Temperature accuracy | Difference between the defined target and the measured result | Indicates how closely the product follows its approved specification |
| Heat distribution | Temperature differences between measurement locations | Shows whether the usable working zone heats evenly |
| Temperature stability | Variation at one measurement point over a defined steady-state period | Shows whether the temperature remains controlled after warm-up |
| Overshoot | Peak temperature above the intended level during or after warm-up | Reveals behavior that a single final reading can miss |
| Recovery | Temperature response after a defined thermal load | Shows how the system responds when heat is removed during use |
| Unit-to-unit consistency | Difference between nominally identical samples | Helps assess repeatability before production |

A displayed value should not automatically be treated as the temperature of every heated tooth.
For a broader explanation of how the heater, temperature sensor, controller, heat spreader, and working surface interact, see our hair straightener brush heating system guide.
What Should Be Defined Before the Temperature Test?
The test method should be fixed before data collection begins. Otherwise, a buyer may compare products under different conditions and mistake a test-method difference for a product problem.
At minimum, record:
- exact model and revision;
- sample identification;
- approved product specification;
- corded or cordless power configuration;
- temperature levels to be tested;
- starting condition;
- ambient test conditions;
- measurement instrument;
- measurement locations;
- sensor attachment method;
- sampling or logging method;
- warm-up definition;
- steady-state evaluation period;
- acceptance criteria.
Acceptance limits should come from the approved specification, development requirement, or agreed test plan.
No universal temperature tolerance or stability band can be applied automatically to every straightener brush.
A compact cordless model, a high-power corded platform, and a product using a different heating architecture may need different acceptance criteria even when their highest selected temperatures appear similar.
What Equipment Should Buyers Use?
Contact sensors, infrared thermometers, and thermal cameras can all provide useful information, but they do not measure temperature in exactly the same way.
Contact Thermocouples
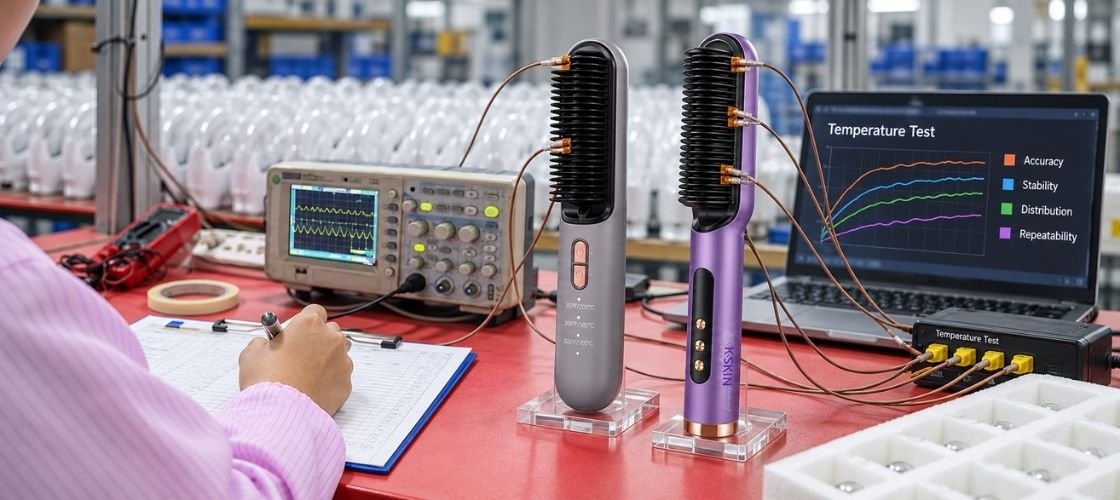
Thermocouples can be attached to selected locations and connected to a multi-channel data logger for continuous temperature recording.
This approach is useful when comparing:
- warm-up curves;
- peak temperature;
- steady-state variation;
- repeated operating cycles;
- several locations at the same time;
- multiple samples using the same method.
The readings are useful only when the sensor type, attachment method, position, and thermal contact are controlled.
A poorly attached thermocouple can produce a different result from one mounted firmly and consistently.
The NIST ITS-90 Thermocouple Database provides reference functions and tables for common thermocouple types. Buyers conducting product evaluations must still use suitable instruments and maintain their own calibration and equipment records.
Infrared Thermometers and Thermal Cameras
Infrared tools are useful for visualizing heat distribution without physically attaching a sensor to every location.
They are particularly helpful when comparing:
- center-to-edge temperature patterns;
- unexpected hot or cold areas;
- heat transfer toward the surrounding guard structure;
- differences between samples.
Infrared measurement should not, however, be reduced to pointing a handheld thermometer at one location and recording a single number.
Surface emissivity, viewing angle, distance, target size, and surface finish can all affect infrared readings. Shiny or reflective surfaces are particularly difficult to measure. Fluke’s infrared thermometer measurement guidance also identifies emissivity and target size as important measurement considerations.
A straightener brush may contain coated metal, plastic, ceramic-coated parts, and other materials. One emissivity setting may not be equally suitable for every surface.
The most useful approach is to define the measurement method before comparing samples and apply it consistently throughout the test.
Where Should Temperature Be Measured on a Straightener Brush?
A single center reading cannot describe the entire working zone.
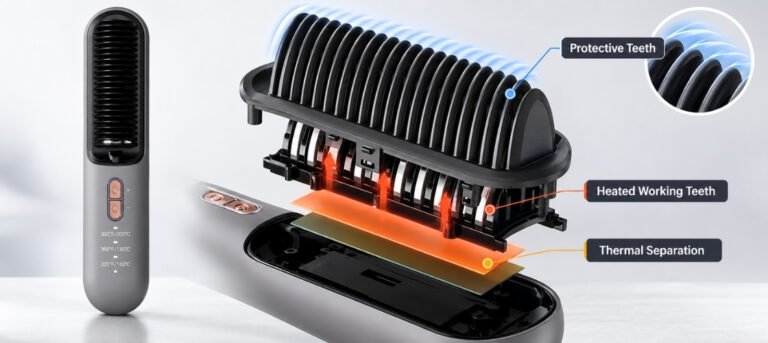
The brush head has a three-dimensional structure that may include upper and lower areas, center and edge regions, heated teeth, protective teeth, surrounding housing, and a transition area toward the handle.
Measurement points should therefore follow the actual product structure.
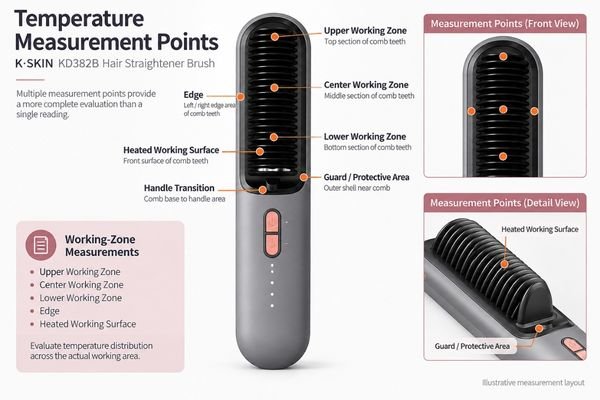
A practical measurement layout may include:
- upper working zone;
- center working zone;
- lower working zone;
- left or right edge of the heated area;
- corresponding opposite edge where useful;
- representative heated tooth or working surface;
- protective or guard area where relevant;
- transition area toward the handle where heat transfer needs to be checked.
The aim is not to create as many measurement points as possible.
It is to capture the locations that represent the usable heating area and those where unwanted temperature differences could affect the product decision.
For repeated testing, mark each measurement point clearly so that Unit A, Unit B, and Unit C are not measured at slightly different locations.
How Should the Temperature Test Be Run?
A repeatable test should record the full temperature behavior rather than only the final reading.
Step 1: Identify the Exact Sample Version
Record the model, revision, sample number, heating configuration, electrical version, and relevant specification.
Do not combine test data from visually similar versions unless their technical configurations have been confirmed as identical.
Step 2: Start From Comparable Conditions
All samples should begin under comparable starting conditions.
Record the ambient environment and initial product condition. For cordless products, define the battery state. For corded products, confirm the intended rated electrical configuration and test supply.
If one sample starts cold while another has just completed a heating cycle, their warm-up curves are not directly comparable.
Step 3: Install Sensors at Fixed Measurement Points
Use the same locations and attachment method on every sample.
If thermocouples are used, confirm that the sensors remain in position throughout the heating cycle.
If thermal imaging is used, keep the viewing distance, angle, emissivity settings, and evaluation locations consistent.
Step 4: Test the Required Temperature Settings
If every temperature level is part of the approved product specification, each level should be checked according to the agreed plan.
For products with many levels, a more detailed time-series analysis may focus on selected low, middle, and high settings, but only when that approach has been defined in advance. Functional confirmation of the remaining settings should not be confused with full thermal characterization.
Step 5: Record the Warm-Up Curve
Begin recording when heating starts, not only when the product indicates that it is ready.
This allows the buyer to observe:
- heating rate;
- differences between measurement locations;
- time to the defined target range;
- peak temperature;
- overshoot;
- transition into steady operation.
A ready light or stable display does not prove that every working point has reached the intended temperature.
Step 6: Continue Through Steady-State Operation
Do not stop the test as soon as the target temperature is reached.
Continue recording long enough to observe how the heating system behaves after warm-up.
Depending on the control system, the temperature may cycle, modulate, or gradually settle. A single reading taken at a favorable moment can hide unstable behavior.
Step 7: Repeat the Test
Repeatability matters at two levels:
- The same sample should behave consistently across repeated runs.
- Different samples of the same approved version should show acceptable unit-to-unit consistency.
For an early commercial comparison, testing three units can reveal obvious variation more effectively than relying on one carefully selected sample. The final sample quantity should still reflect the project risk and agreed validation plan.

How Should Temperature Accuracy Be Calculated?
Temperature accuracy should always be tied to a defined target, measurement location, and operating condition.
A simple temperature error can be expressed as:
Temperature error = measured temperature − defined target temperature
If the selected level is 180°C, for example, the result should not automatically be judged by comparing the hottest point on the brush with 180°C unless the approved test method defines that comparison.
The buyer needs to know:
- what the 180°C setting is intended to represent;
- where the temperature should be measured;
- when the measurement should be evaluated;
- what tolerance applies to that exact product version.
This distinction is especially important when the temperature display represents a programmed setpoint while the control sensor is located inside the heating assembly.
The sensor is part of the control system. It does not necessarily measure the same temperature that an external thermocouple records on every working tooth.
How Should Temperature Stability Be Evaluated?
Temperature stability is not the same as temperature accuracy.
A sample can average close to its target while cycling across a wide temperature range. Another sample can remain very stable while consistently operating above or below its specified target.
Both conditions matter.
For a defined steady-state period, buyers can compare:
Stability range = highest measured temperature − lowest measured temperature
This calculation should be performed separately for each relevant measurement point rather than averaging the entire brush into a single number.
A useful stability record should show:
- actual time-series data;
- selected temperature level;
- measurement point;
- maximum value;
- minimum value;
- average value where useful;
- observed cycling or control pattern;
- sample identity.
Do not smooth the data so aggressively that short temperature peaks disappear.
The purpose is to understand the product’s control behavior, not to produce the cleanest-looking graph.

How Should Heat Distribution Be Evaluated?
Temperature accuracy at the center of the brush does not prove that the temperature is uniform across the working area.
A simple spatial comparison can be expressed as:
Spatial temperature spread = hottest working point − coolest working point
The acceptable difference must still be defined by the product specification or project requirement.
Buyers should look for patterns, not just one number.
For example:
- Is the center consistently hotter than the upper and lower zones?
- Does one edge remain cooler?
- Does the difference increase at the highest setting?
- Does the pattern repeat across several samples?
- Does the heat distribution match the intended hair-contact geometry?
This is where temperature testing and comb design intersect.
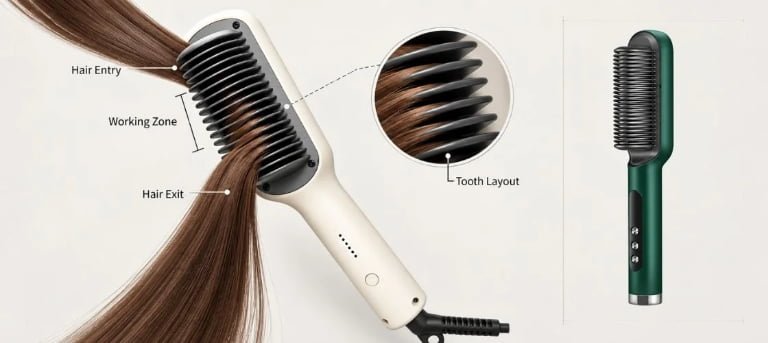
Hair does not contact one theoretical point. It passes through a three-dimensional tooth structure. A temperature map is therefore more useful when interpreted alongside tooth spacing, heated-surface area, coating, protective geometry, and representative styling contact.
Why Cordless and Corded Straightener Brushes Need Different Test Controls
The basic temperature metrics are similar, but the power architecture changes what must be controlled.
The KD382B cordless ionic straightening and curling brush is a rechargeable 25 W platform with a 2500 mAh battery and three defined settings: 160°C, 180°C, and 200°C.
For this type of cordless platform, the test record should define the battery state so that available energy and control behavior are evaluated from a known starting condition.
The KD380K ionic hair straightening and curling brush is a corded, PTC-based platform with nine settings ranging from 120°C to 200°C.
For this type of corded platform, the test record should clearly identify the electrical version and supply conditions.
These examples also show why a generic test sheet should not be copied blindly from one straightener brush to another.
Buyers can compare platforms within the broader K·SKIN Hair Styling Tools range, but the final test plan must follow the exact product architecture.
What Results Should Trigger Retesting or Investigation?
Temperature results should lead to a decision, not simply fill a spreadsheet with numbers.
| Result Pattern | Possible Interpretation | Buyer Action |
|---|---|---|
| All defined points meet the approved criteria | Thermal performance is consistent with the tested requirement | Continue approval for this version |
| One point differs unexpectedly | A local heat-transfer, sensor-position, assembly, or measurement issue may exist | Investigate and repeat the affected measurement |
| Large center-to-edge difference | Heat distribution may not match the working-zone requirement | Review the thermal structure and measurement layout |
| Repeated overshoot | Control tuning or thermal inertia may require review | Hold approval until the cause is understood |
| Stable but consistently off target | Setpoint, sensor location, calibration, or specification alignment may be wrong | Compare the product configuration with the approved specification |
| One sample differs from the others | Unit-to-unit variation may exist | Expand the sample comparison and investigate assembly or component variation |
| Infrared and contact measurements disagree | The measurement method may be contributing to the difference | Review emissivity, sensor attachment, locations, and instrument setup |
| Results change significantly between repeated runs | Starting conditions or product behavior may not be controlled | Standardize the conditions and retest |
A retest should not repeat the same uncertain method in the hope of obtaining a better result.
First identify the suspected source of variation, then correct or clarify the test method.
What Should Be Recorded Before Temperature Approval?
Temperature approval should leave a usable technical reference.
A practical record should include:
- product model and revision;
- sample numbers;
- approved temperature settings;
- electrical or battery configuration;
- measurement instrument identification;
- relevant calibration status;
- measurement-point diagram;
- sensor attachment method;
- ambient and starting conditions;
- raw temperature data;
- warm-up curves;
- steady-state records;
- thermal images where used;
- calculation method;
- acceptance criteria;
- deviations and corrective actions;
- retest records;
- final approval decision.

Once the thermal behavior has been approved, the corresponding product version should be controlled.
Changes to the heater, sensor, control logic, firmware, heat-spreading structure, comb assembly, coating, insulation, battery system, or electrical configuration can affect thermal behavior and may require an impact review and revalidation.
This connects sample testing directly with manufacturing and quality control.
Temperature testing does not replace formal product-safety or market-access testing. Depending on the product and destination market, hair-care appliances may fall within requirements such as IEC 60335-2-23. Commercial sample evaluation and formal compliance testing should therefore remain related but separate activities.
Buyer Takeaway: What Should You Confirm Before Approval?
A straightener brush should not be approved because one infrared reading matches its display.
Before thermal approval, confirm that:
- the exact sample version is identified;
- measurement points are fixed and repeatable;
- the instrument and measurement method are appropriate;
- all required temperature levels have been evaluated;
- warm-up behavior has been recorded;
- overshoot has been checked;
- steady-state temperature stability is understood;
- working-zone heat distribution is acceptable;
- multiple samples show reasonable consistency;
- cordless or corded power conditions are controlled;
- acceptance criteria were defined before the results were reviewed;
- the approved thermal configuration will be controlled in production.
The aim is not to prove that the brush becomes hot. It is to establish whether the approved version delivers controlled, repeatable temperature behavior across the working area under defined conditions.
Frequently Asked Questions
Is the displayed temperature the same as the actual brush temperature?
Not necessarily. The displayed temperature may represent a programmed setpoint, while the internal sensor and external working surfaces may be at different temperatures. Buyers should compare the selected setting with measurements taken at defined working-zone locations.
Can I test a straightener brush with only an infrared thermometer?
An infrared thermometer can support sample evaluation, but a single handheld reading is not enough for a complete temperature accuracy and stability test. Surface emissivity, measurement distance, spot size, geometry, and measurement location can all affect the result. Depending on the test objective, continuous contact measurement or thermal imaging may provide additional information.
How many temperature measurement points should be used?
There is no universal number. Use enough fixed points to represent the actual working zone and reveal meaningful center-to-edge or upper-to-lower differences. The locations should follow the brush geometry and remain identical across samples.
How many samples should be tested?
Testing more than one sample is preferable. Three units can be useful for an early B2B sample evaluation because they may reveal obvious unit-to-unit variation, but the final quantity should reflect the project risk, product maturity, and agreed test plan.
Does faster warm-up mean better temperature performance?
No. Warm-up speed is only one part of thermal performance. A fast-heating product can still show excessive overshoot, poor heat distribution, unstable steady-state behavior, or weak unit-to-unit consistency.
What should be frozen after the temperature test is approved?
Freeze the approved sample revision together with the relevant heater, sensor, controller or firmware, heat-spreading structure, comb assembly, insulation, electrical or battery configuration, test method, measurement points, and acceptance criteria. Later changes should be reviewed for their potential thermal impact.
Conclusion
Hair straightener brush temperature testing should distinguish between the setpoint, actual working temperature, spatial distribution, and time-based stability. The results are useful only when the measurement locations, equipment, starting conditions, power configuration, and acceptance criteria are controlled.
For brands, importers, and private-label buyers, the most valuable output is not one favorable temperature reading. It is a repeatable test record that defines the approved thermal behavior of a specific product version and gives manufacturing a reference that can be maintained during production.
To evaluate an existing platform or discuss a private-label hair straightener brush project, review K·SKIN’s Hair Styling Tools or contact our project team with your target market, product platform, temperature requirements, and sample-evaluation scope.